System Organization & Navigation
The system has a few pages within it, each serves a specific purpose. The pages can be accessed from the menu on the left side of the website.

Dashboard page
This is where the user can see information about his account balance and days until renewal. As well as having a graph which shows the user the number of searches that were made according to different filtering options.
From this page, the user can also navigate to the packages page in order to update or change his package from the available packages. This can be done by clicking on ‘change button’ link.
The user can also navigate to the search page directly by clicking on ‘Start new lookup’.
From this page, the user can request a custom package according to his preferences.
Clicking on ‘request’ will open a small popup where the user can insert details about a custom package according to his preferences.
Clicking on ‘send request’ will send the admin a message about the details of the user’s request. This way the admin will be able to create a customized package especially for this user.
Clicking on the balance and renewal bar will navigate the user to the packages page.
Report Generation Page
The Report Generation Page is the primary workspace within the ClearCheck platform. This is where users initiate and manage employment-related background check reports using their available credits.
From this page, users enter candidate information and select the appropriate report type based on their screening needs and purchased package. Each report generation uses a predefined number of credits, which is clearly displayed before the report is initiated.
The search page will be discussed further in the upcoming sections.

Packages page
This is where the user can view the available packages that can be bought. Each package has a unique set of workflows and features that the user can use. This is also where the user can see his active package and if there’s a need to upgrade to a better package. The prices on the packages represent the balance that is added to the user once he makes the purchase. The icons on the package represent the social networks that the package includes.

By clicking on the ‘buy’ button, the user is navigated to a new tab where he can complete the payment process. Upon completing the payment by inserting all valid data, the user can go back to the website and refresh the page to receive the contents of the new package that was purchased. This includes updated balance and updated days until renewal.

Settings page
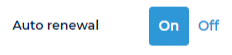
This is where the user can view his personal information. The information includes: first and last names, email address, password, phone number, set a profile picture and turn auto-renewal on/off.
The user can edit his personal information like the name or first name. This can be done by changing the inserted characters in the first or last name fields and then clicking on the ‘save’ button that appears next to each of the edited fields.
The user can also edit other personal information like the email or phone number, but these require further verification.
The user can change his email address by clicking on the change email button next to the email field.
After clicking on this button, a popup opens requiring the user to insert the new email and the password of his account.
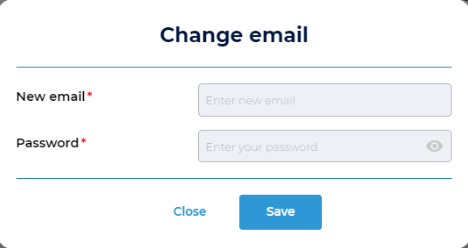
After completing this step, the user is logged out of the system and receives an email on the newly inserted email requiring him to verify this email address. After that, the user can access his account using his new email address.

The user can change his phone number by clicking on the ‘change phone number’ button next to the phone number field.

After clicking on this button, a popup appears requiring the user to insert a new phone number. Upon clicking on ‘save’ after inserting a valid phone number, the popup changes to show a code field. The user should receive a verification code to the new phone number. After inserting the correct code, the phone number of the user will be successfully changed.

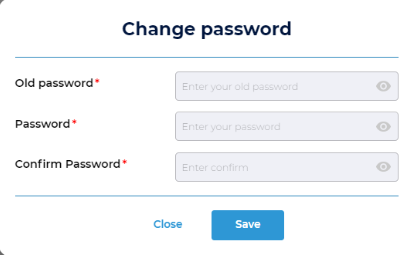
The user can also change his password from this page. This can be done by clicking on the ‘change password button’ next to the password field.

Upon clicking the button, a popup will appear requiring the user to insert the old password, a new password and to confirm the new password. After inserting the appropriate info, the user should click the ‘save’ button. This will make the new password appear in the password field where the user can choose to show or hide it from the page.
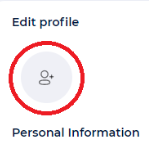
The user can further personalize his account by adding a profile picture when clicking on the person icon at the top left of the page.
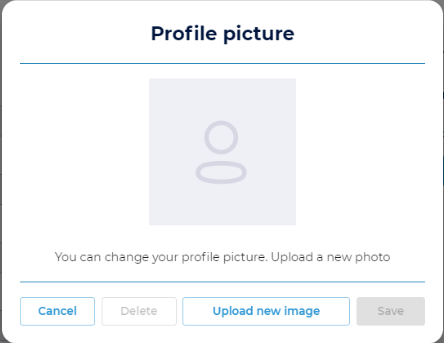
This will open a popup where the user can insert a profile picture by clicking on ‘Upload new image’. The user can save or cancel the newly uploaded image. As well as the ability to delete the profile image.
The user can turn the auto-renewal on and off to determine if he wants to renew the purchased package automatically or not.
Last updated