2FA Activation
Welcome to the Two-Factor Authentication (2FA) activation guide. This page will walk you through the steps to enhance the security of your account using 2FA. Let's ensure your digital safety
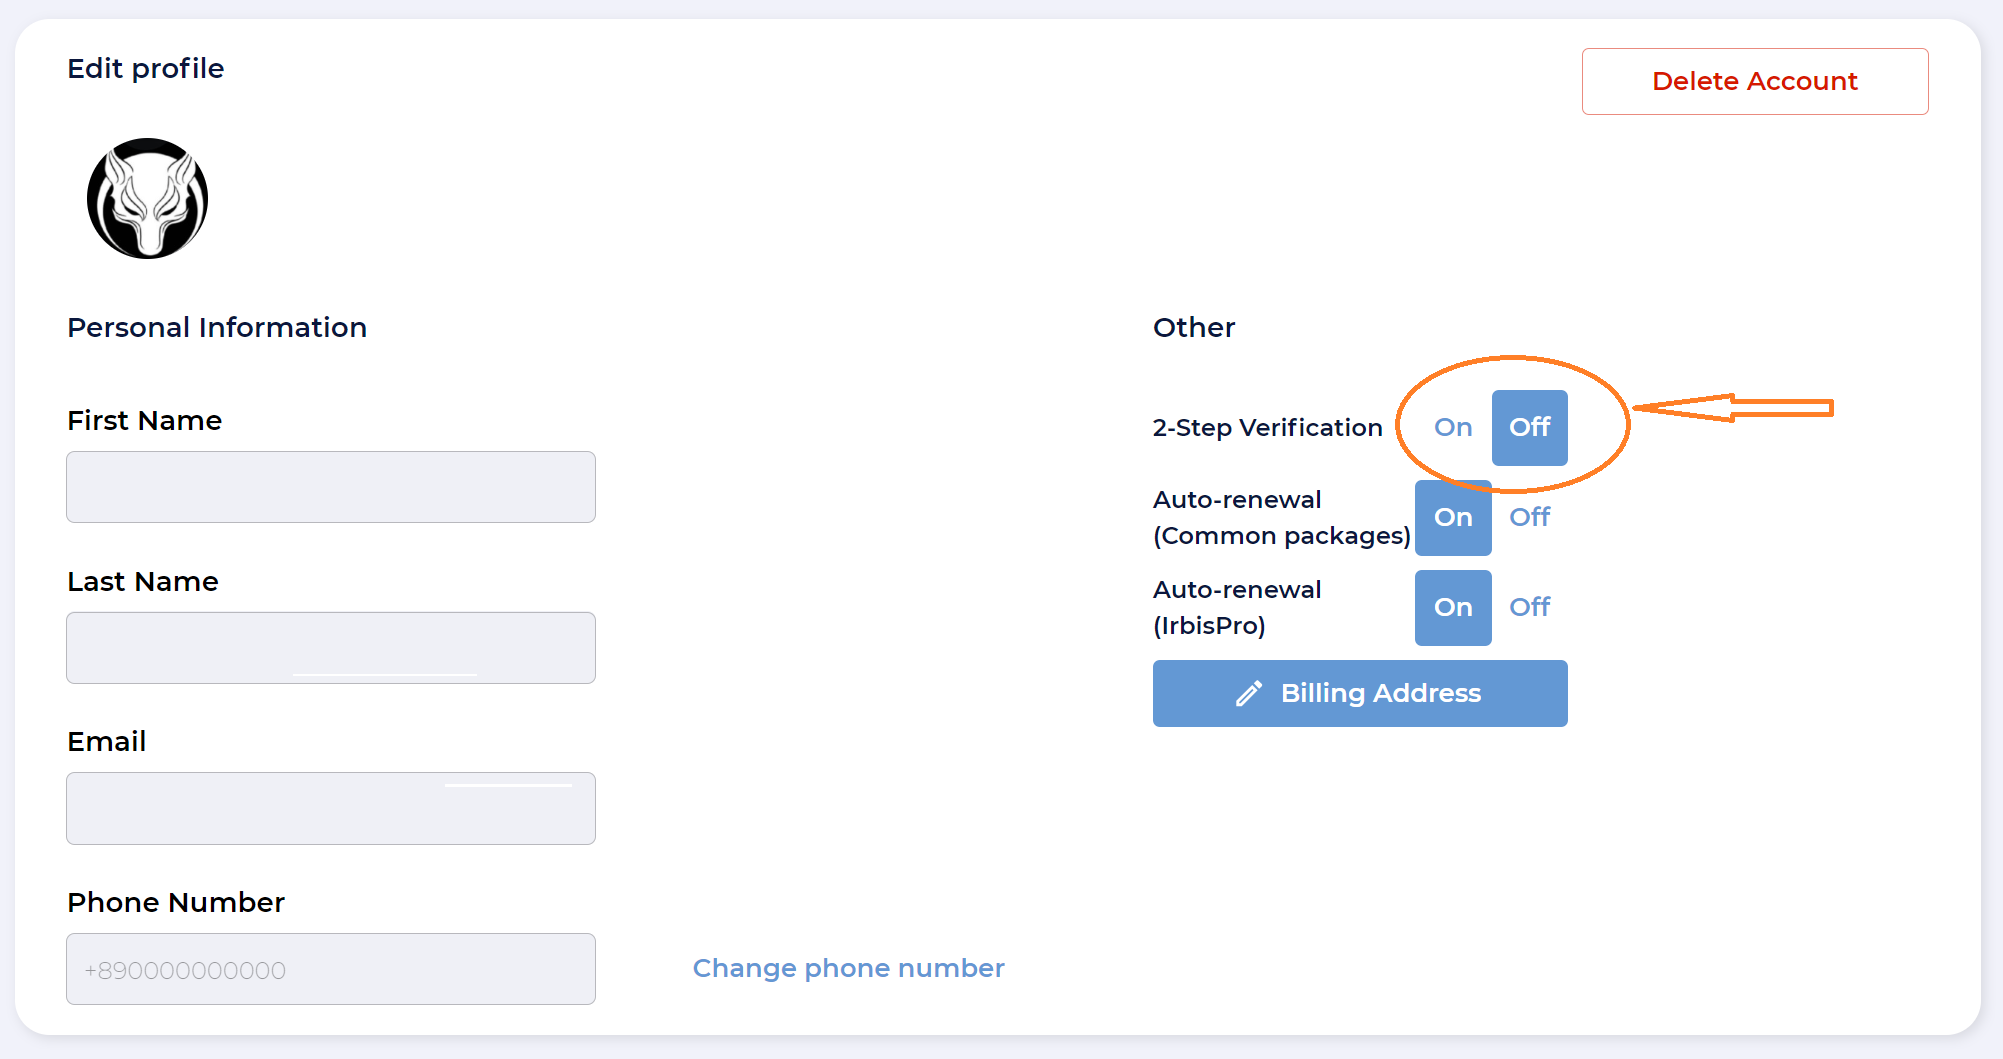
Step 1: Enabling 2FA
Navigate to your Clearcheck account settings.
Locate the 2FA toggle and turn it on to initiate the setup process.

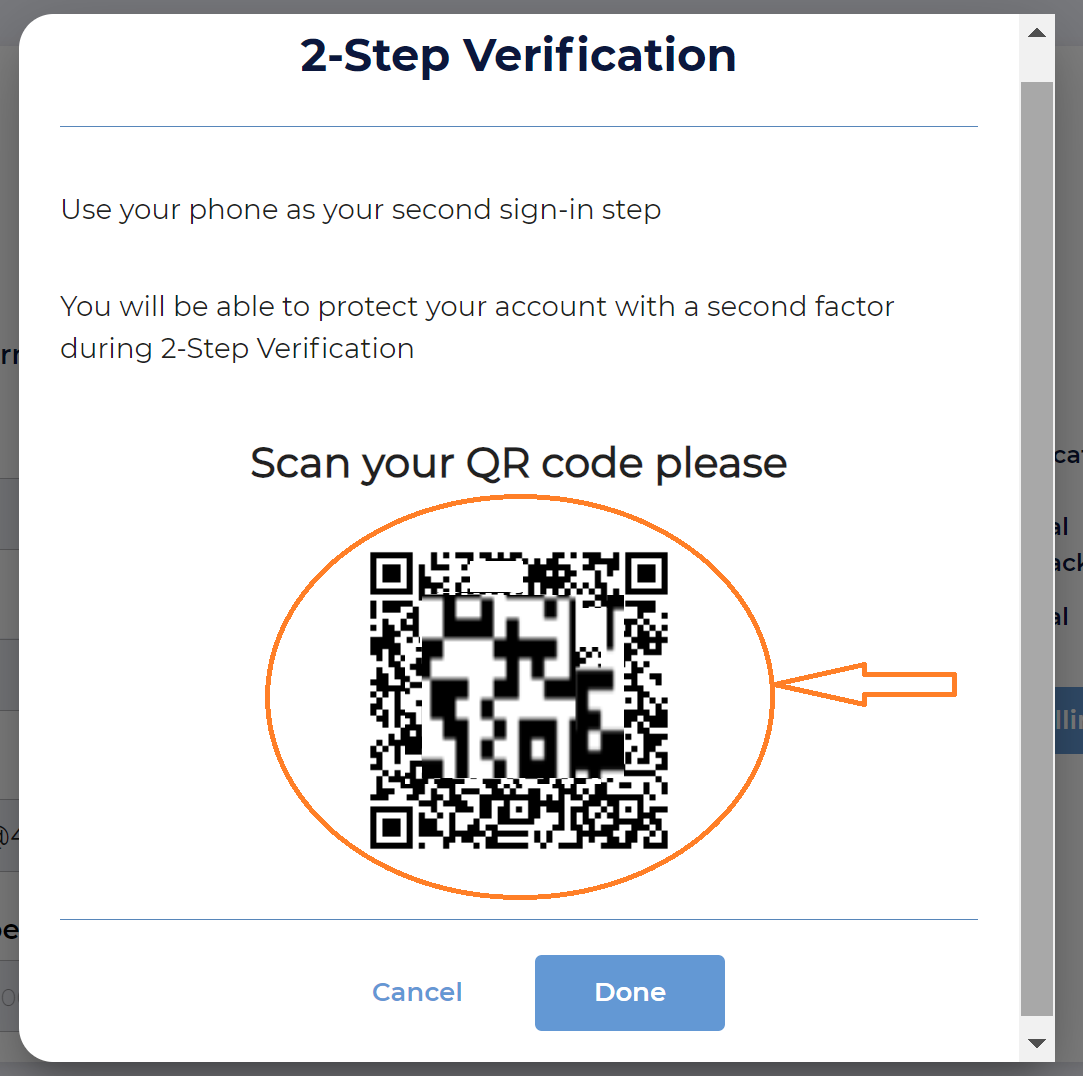
Step 2: Scanning the QR Code
Upon enabling 2FA, a QR code will be displayed on your screen.
Use your phone to scan the QR code. This action will redirect you to your phone's password manager.

Step 3: Managing Password Records
For Existing Password Records:
Select an existing password record if you're operating from your phone and have previously saved login credentials.
For New Password Records:
If you have no existing records, opt to create a new password record.
Enter the following details:
Website Address: www.tools.clearcheck.io
Login: Your Clearcheck account login
Password: Your Clearcheck account password
Save the new record in your password manager.
Step 4: Using the 6-Digit Code
The record saved in your password manager will generate a 6-digit code.
Enter this 6-digit code into the designated window in your Clearcheck Settings to confirm the activation of 2FA.
Note: Activating 2FA will log you out from the Clearcheck platform as a security measure.
Step 5: Logging In with 2FA
To log back into Clearcheck, open your password manager.
Retrieve the 6-digit code, which will always be available in the record you've saved.
Enter this code on the Clearcheck login page along with your credentials.
Important Note for iOS Users:
iOS devices save the password under the clearcheck.io address. Ensure to look for this address when searching for your 2FA code in the password manager.
By following these steps, you will have successfully enhanced the security of your Clearcheck account using Two-Factor Authentication. For any further assistance or inquiries, please contact our support team.
Last updated